Tips for customizing what your customers see on your reseller package.
When you first log in, you’re going to see an interface that is nothing like what you’re used to as a normal MXroute customer. This is what DirectAdmin looks like for resellers, and without our customizations.
It’s okay to feel a little overwhelmed here, but I’m going to walk you through some of the customizations that we make for our users so that you can do the same for yours, or do it differently if you prefer.
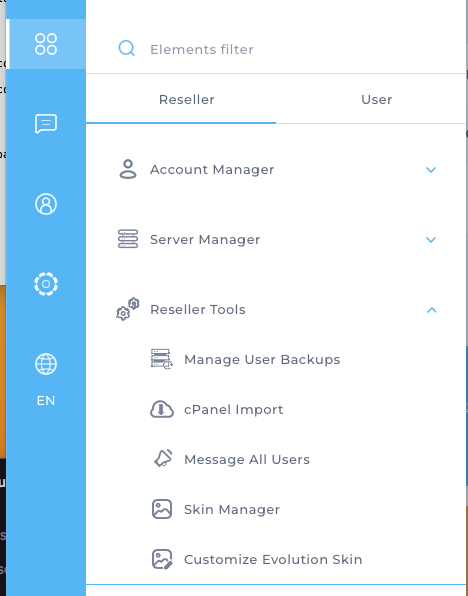
First, I want you to go to the Reseller Tools menu and you’ll see this dropdown:
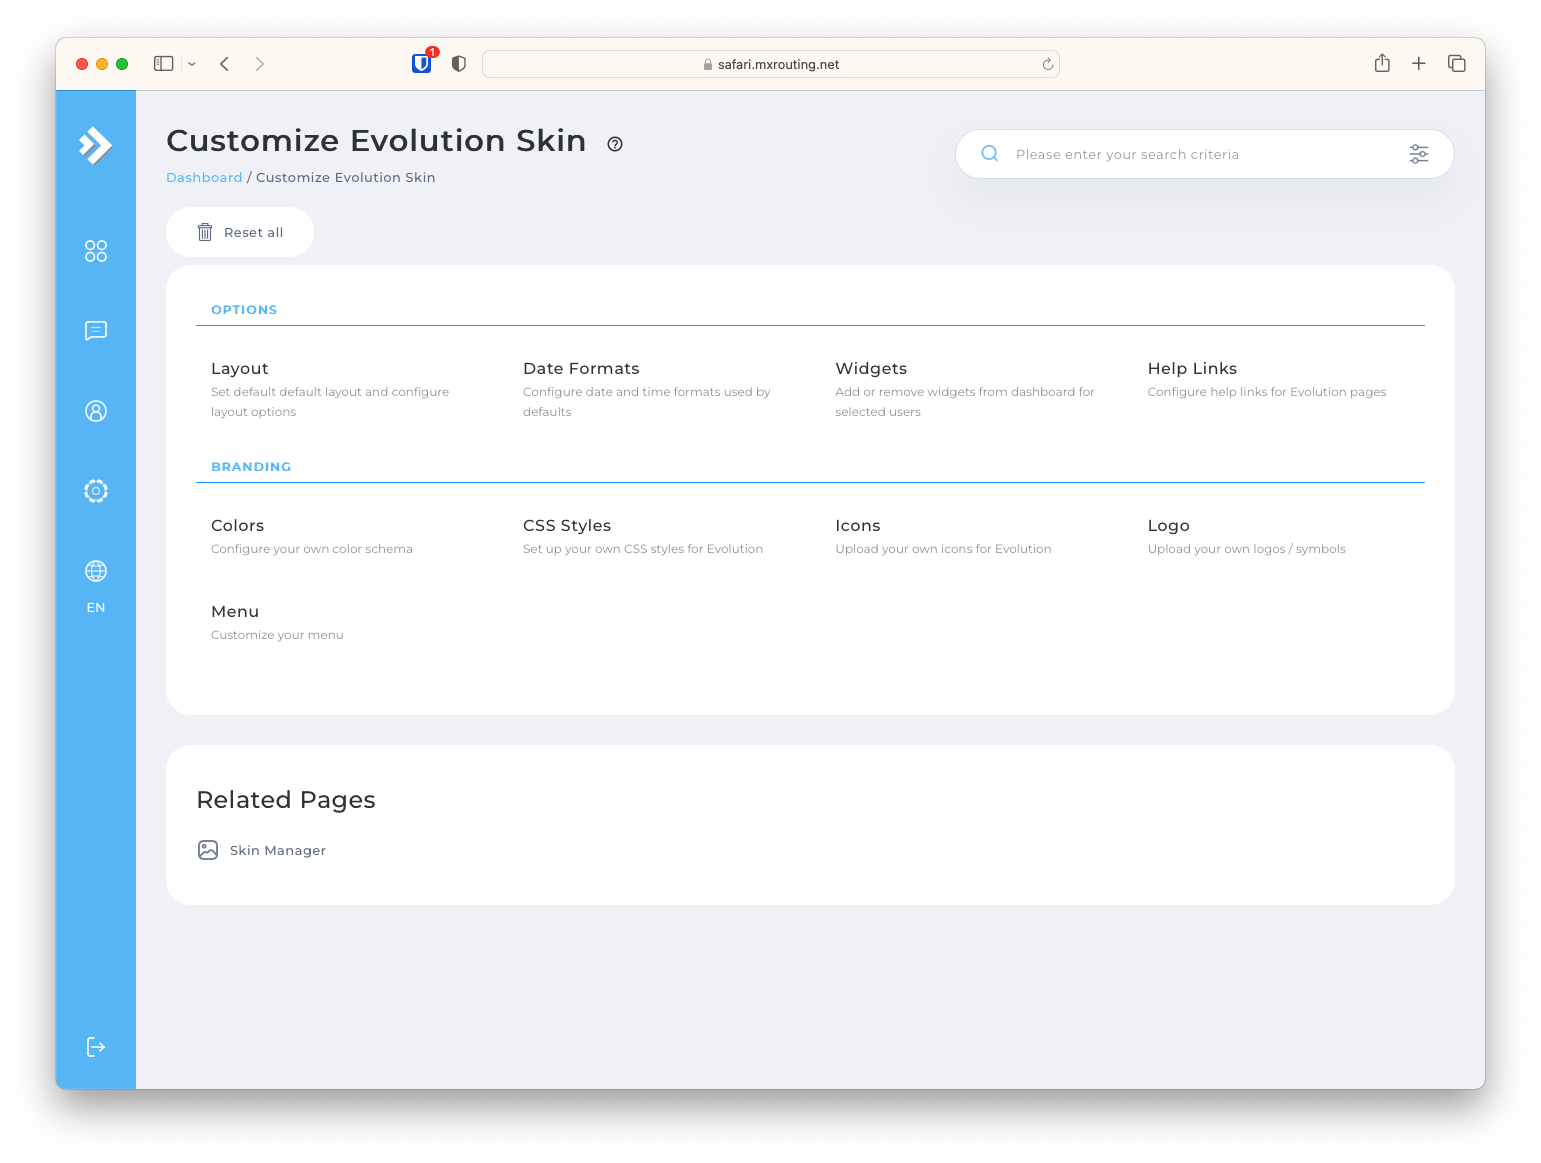
From there, click Customize Evolution Skin. Then you’ll find yourself here:
From there, click on Menus to begin customizing them. Then you’ll find yourself here:
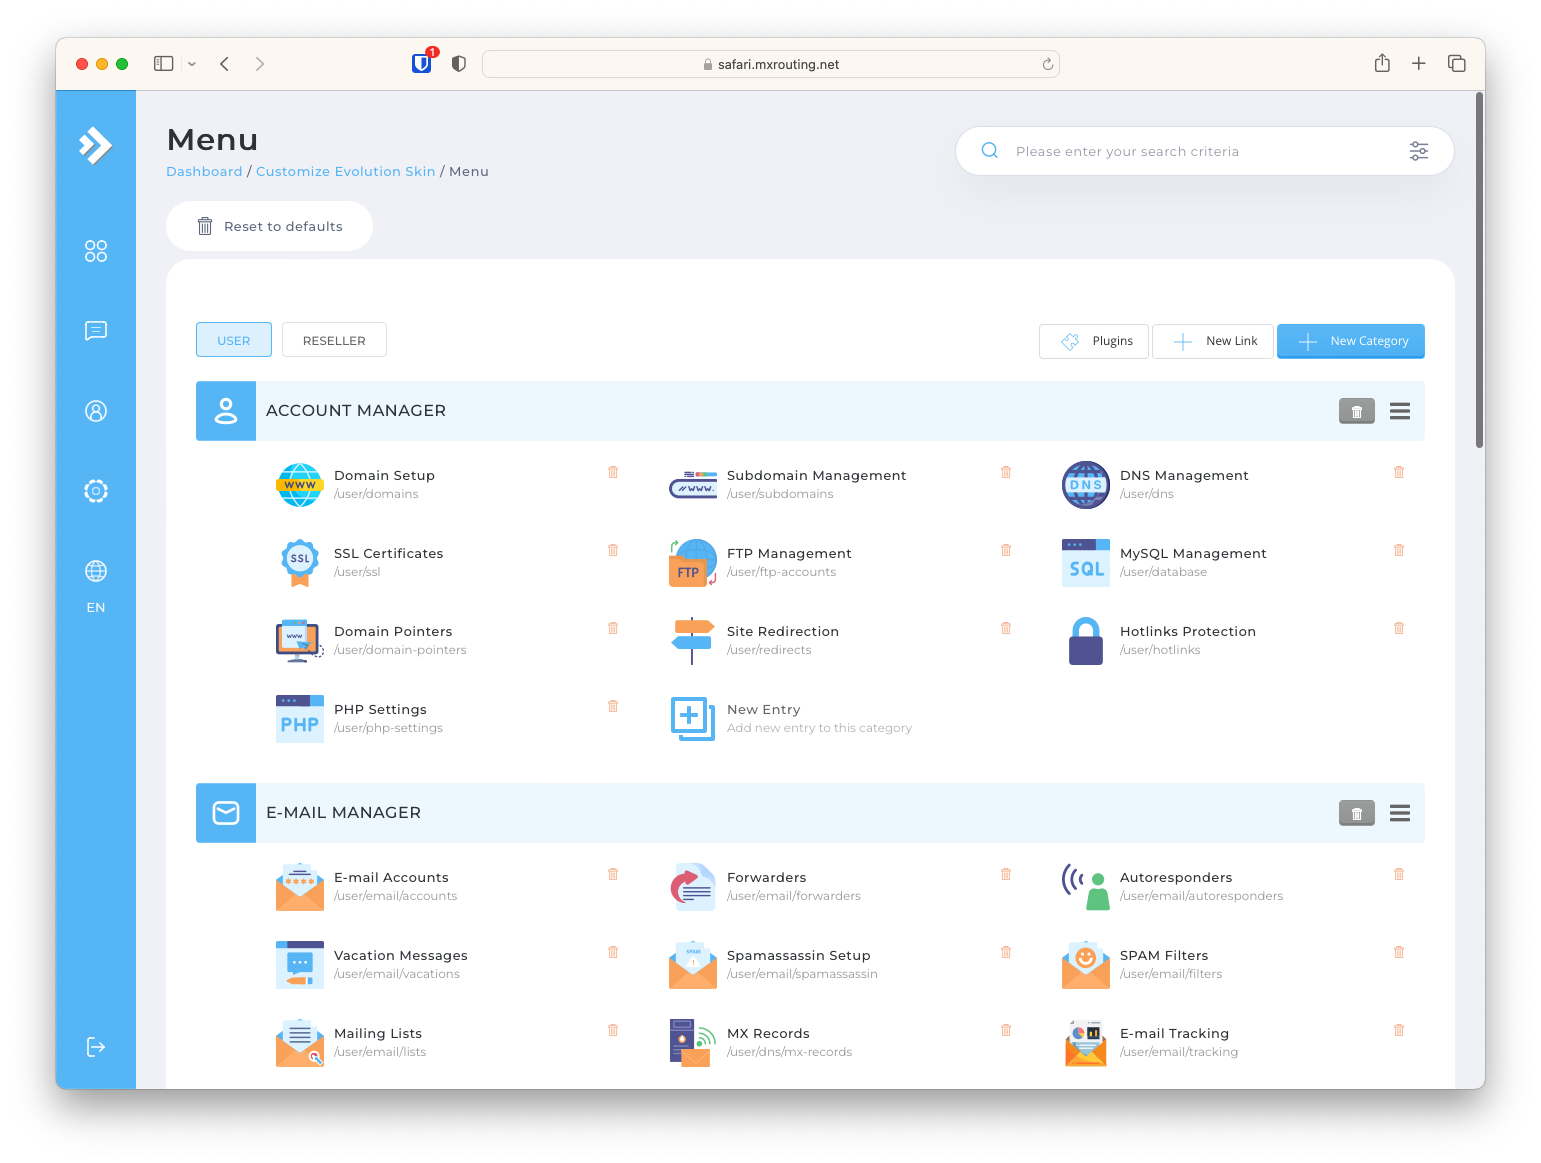
There’s a red trash can to the right of each menu option. We’re going to remove a bunch, because this is a web hosting control panel and we’re an email service.
Under Account Manager click the red trash can to delete:
- Subdomain Management
- FTP Management
- Site Redirection
- MySQL Management
- Site Redirection
- Hotlinks Protection
- PHP Settings
Under Advanced Features delete:
- Apache Handlers
- Cron Jobs
- Custom Error Pages
- Mime Types
- Password Protected Directories
- SSH Keys
- ModSecurity
- Nginx Unit
- Nginx URL Rewrites
- Redis
- Git
- Wordpress Manager
- ClamAV
On the “System Info & Files” title itself, there’s a grey trash can icon to the right of it. Click that, delete it.
Under Extra Features, delete:
- Squirrelmail
- phpMyAdmin
Under Extra Features, click “New Entry” to add items. Add these:
Entry Type: External
Name: Crossbox
URL: https://mail.mxlogin.com
Entry Type: External
Name: Snappy
URL: https://|HOSTNAME|/snappy
For the Support & Help menu, I recommend disabling it entirely, but you can do what you want there. Just know that if you leave the support center / ticket options, your customers are going to try to open support tickets with you here which you can only view in your DirectAdmin reseller interface.