BEGINNER’S GUIDE TO SETTING UP MXROUTE WITH GMAIL
This tutorial was made by one of our amazing customers.
This guide is designed for people who (like me) have limited experience setting up mail servers or DNS. It will largely depend on three official pages (so you may want to take a look there for further reference):
https://mxroutedocs.com/dns/dkim/ https://mxroutehelp.com/index.php/2019/08/25/custom-webmail-pop-imap-smtp-domain/ https://mxroutedocs.com/directadmin/addemail/
Start
You should have received an email after signing up called “[MXroute] Important Account Information”. It will contain a user/pass and URL for the server on which you’re hosted.
The first thing you should do after logging in is change the password.
Afterwards, follow the instructions in the email to create four DNS records for your domain: two MX records and two TXT records (one SPF and one DKIM). Create one more CNAME record that maps “mail” to whatever you have as your primary MX record.
Unfortunately, since every DNS provider is different, you may have to play around with their interface a bit as there’s no way to cover them all in one guide. Fortunately, we can test whether your setup is correct.
Testing your DNS
Note: it may take 1 minute or as long as 4 hours for DNS changes to “show up” in the tester. This is normal, and there’s no way of making it go quicker.
My domain is “thermite-art.com” and my mxroute server is “arrow”, which comes from the admin URL of https://arrow.mxrouting.net:2222/ (aside: for a list of all servers and their status, visit status.mxroute.com). Other than those two things and the TTL (time-to-live, a number between 0 and usually 3599), everything else should be exactly the same in the ;ANSWER block. Watch out for typos and pay particular attention to trailing periods.
1.Go to https://toolbox.googleapps.com/apps/dig/#MX/, and type in your domain
;ANSWERthermite-art.com. 3599 IN MX 10 arrow.mxrouting.net.thermite-art.com. 3599 IN MX 20 arrow-relay.mxrouting.net.
2.Go to https://toolbox.googleapps.com/apps/dig/#TXT/, and type in your domain
;ANSWERthermite-art.com. 3599 IN TXT "v=spf1 include:mxlogin.com -all"
3.Go to https://toolbox.googleapps.com/apps/dig/#TXT/ 45, and type in x._domainkey. + your domain (In this case, [lots of text] will be different for every domain; we will double-check this text later)
;ANSWERx._domainkey.thermite-art.com. 3599 IN TXT "v=DKIM1; k=rsa; p=[lots of text]" "[lots of text]"
4.Go to https://toolbox.googleapps.com/apps/dig/#CNAME/, and type in mail. + your domain
;ANSWERmail.thermite-art.com. 3599 IN CNAME arrow.mxrouting.net.
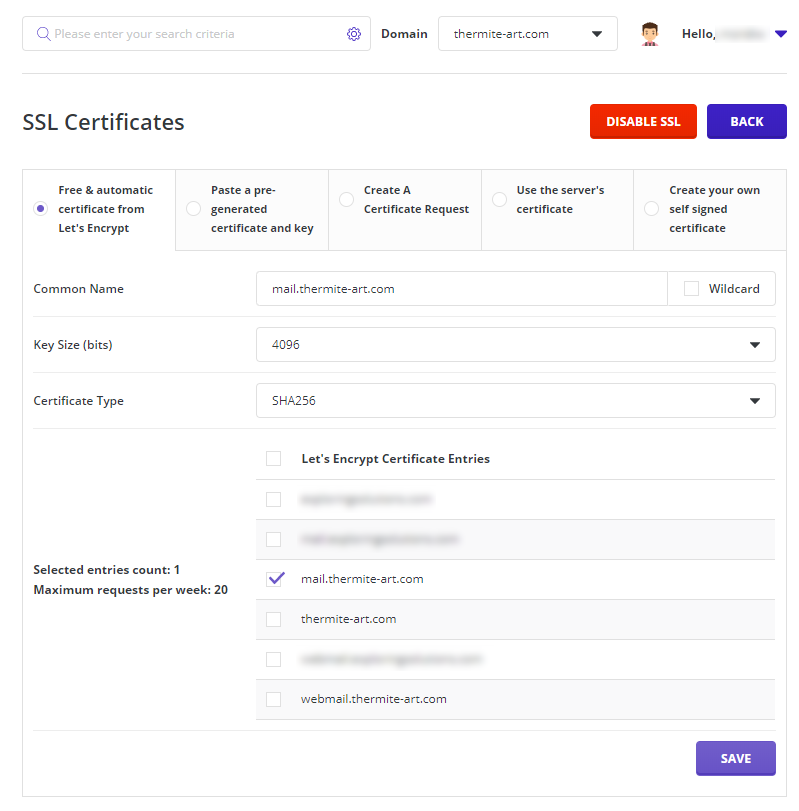
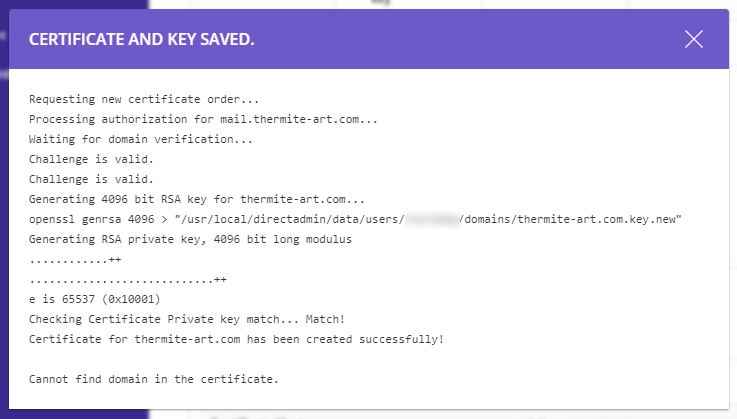
Creating an SSL certificate
The purpose of a certificate is to aid in secure communications, in this case between mxroute and gmail. This will only work once the DNS testing is successful!
In the admin console, go to Account Manager → SSL Certificates and click on the “Free & automatic certificate from Let’s Encryt” tab. Then follow the images below. Note that we’re only setting up the mail domain and not bothering about the webmail one (so it will only be accessible through gmail rather than its own client).
Creating an Account
In the admin console, go to Email Manager → E-mail Accounts and click on the “Create Account” button.
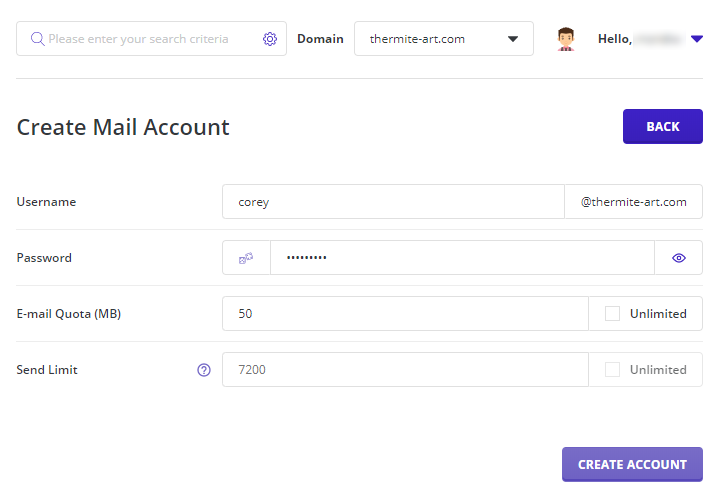
Use the “Generate Random Password” button as there’s no reason for a human to remember this password.
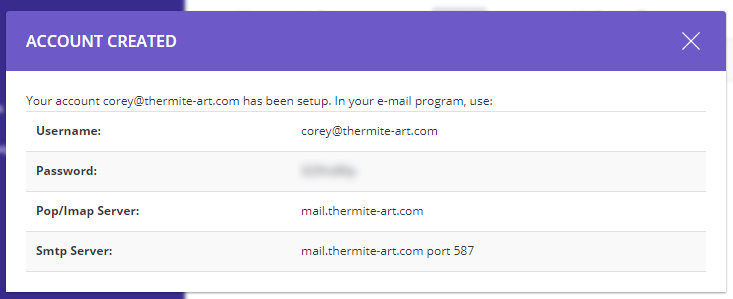
Copy this information (especially the password) to a text editor.
Setting up Gmail
In Gmail, go into settings and select the “Accounts and Import” tab. In the “Check mail from other accounts” section, click “Add a mail account”.
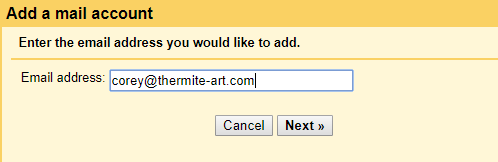


Note the Username is the full address.
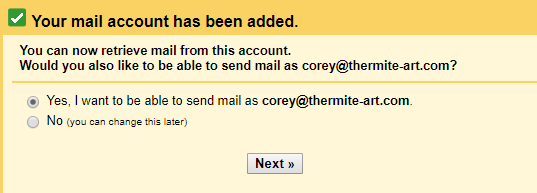
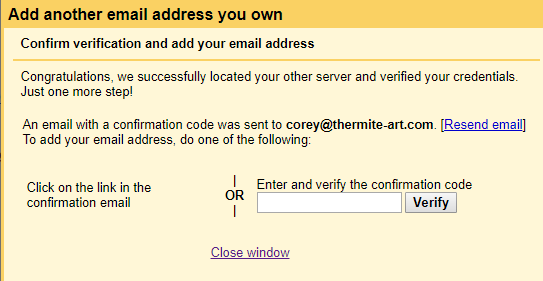
You can click “Close window” as there will be a link in the email from the Gmail team.
Gmail will poll your account a few times an hour on average, which means the time between when an email is sent and when it shows up in Gmail could be up to 20-30 minutes. You can force an immediate poll in settings, on the “Accounts and Import” tab, in the “Check mail from other accounts” section.
Double-checking everything is working
After clicking on the verification link and confirming, refresh your whole gmail tab.
Compose a new message, and “From:” should now be a drop-down whereby you can select your new address.

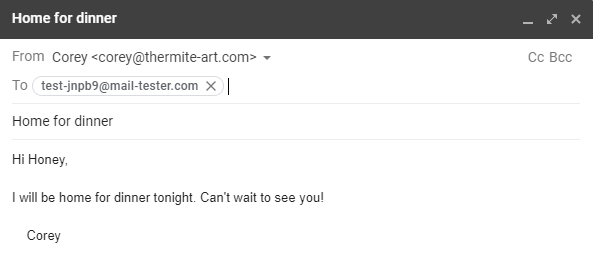
Go to https://www.mail-tester.com/, and use your new alias to send an email to the address shown on the page. The email should be “real”, so avoid words like test, blah, etc.
Now go back to mail-tester page and click “Then check your score”. If it’s a 10 then everything worked!